Installation
Requirements
``GIT available from commandline <https://git-scm.com/>``_
``XAMPP with PHP 8.0 or higher <https://www.apachefriends.org/index.html>``_
``Composer <https://getcomposer.org/>``_
Syntax error while installing? Go to the specified file and place the path within “” marks.
PHP installed in PATH variables (Available as a checkmark in the composer installer)
Access to the restricted github page (Ask RedFirebreak or any collaborator for access)
After making sure that all the requirements are met on your system, you can continue to the next section.
Installation
Note
This is only required if you want to develop for the project, want to see or use the project? Go to the development website or the production website. Further, this installation sets up a XAMPP server on your local machine to start developing.
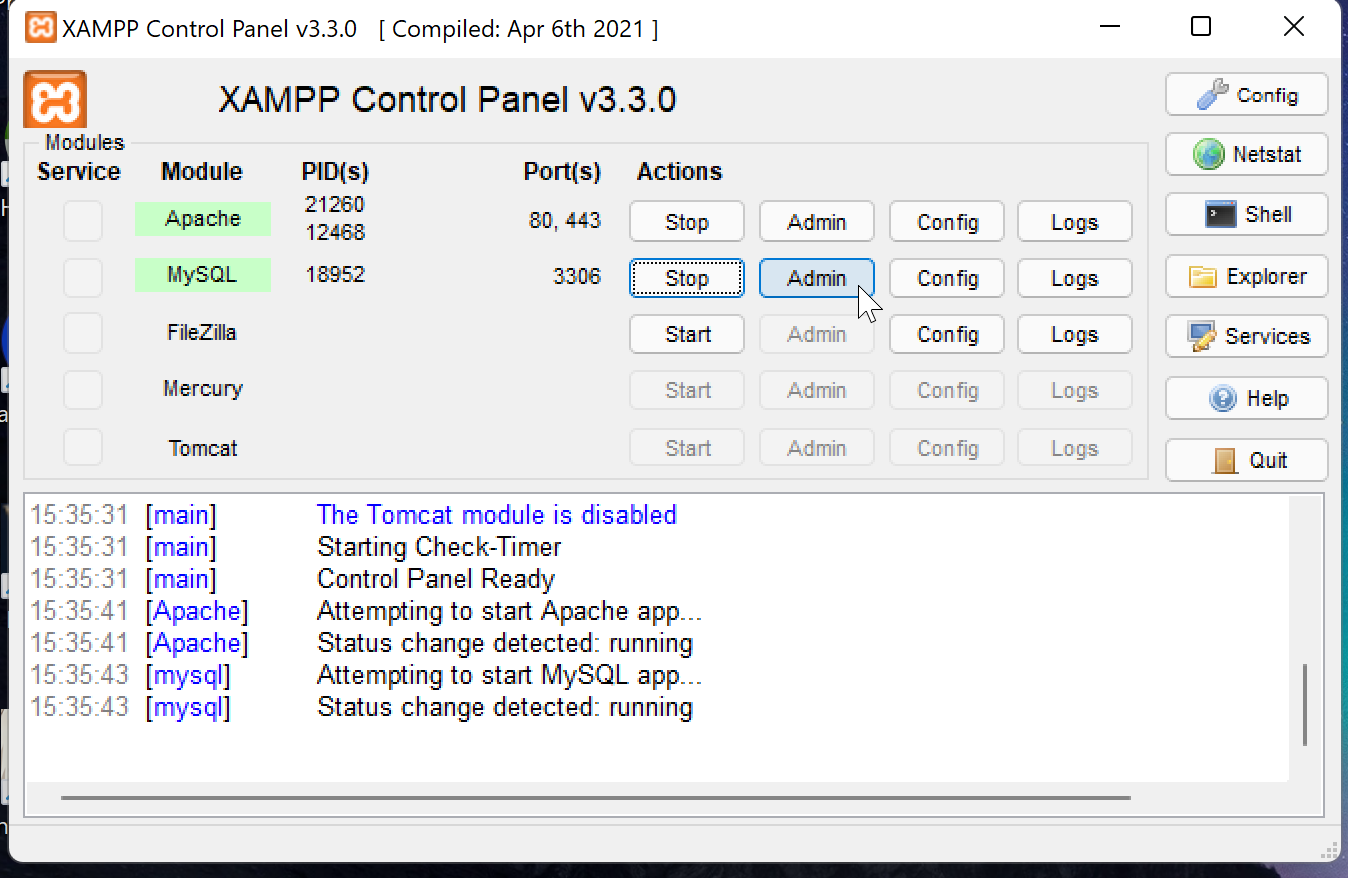
After installing all of the requirements, start your XAMPP control panel, then start the Apache and MySQL. When both of the processes are running and green, click on the admin in the MySQL line. This will open up PHPMyAdmin in your default browser.
With this, we are going to create a new, empty database for our project. This is nessecary to make sure the website can store and retrieve data. On this window, click on “nieuw”.
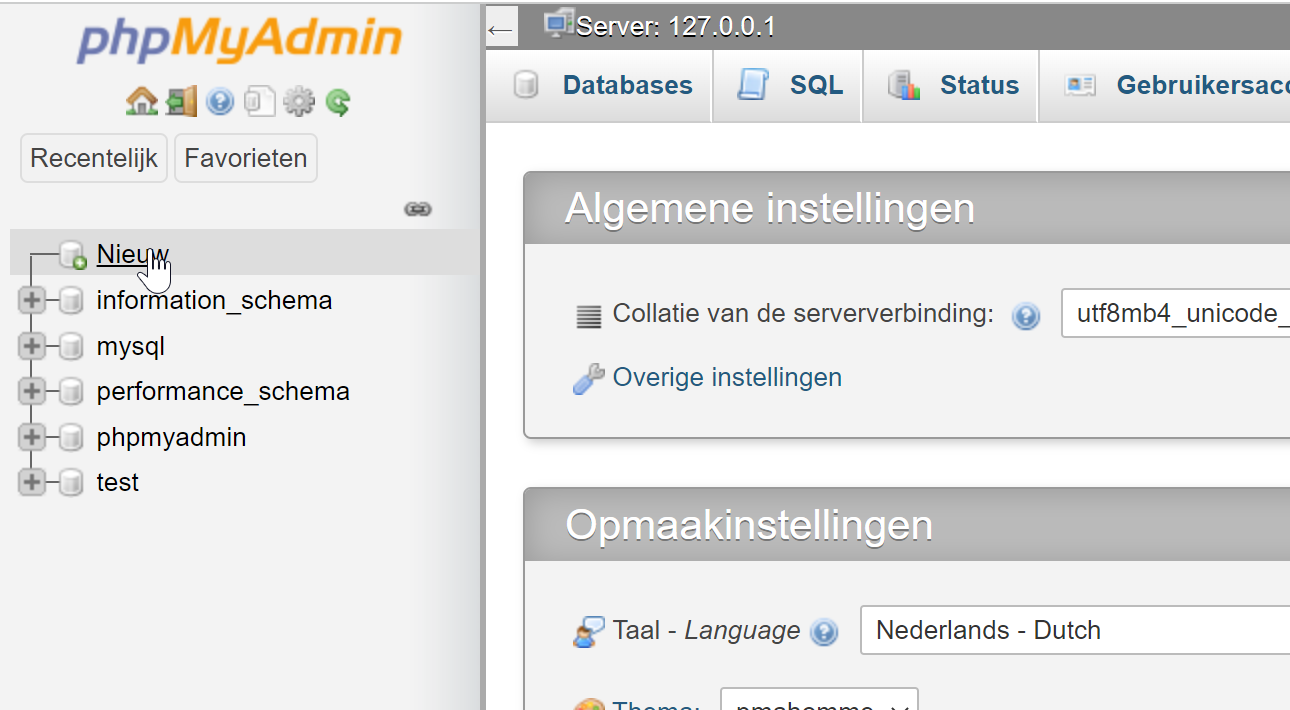
Then, give your database a simple name. For example: laravel will do just fine. After filling in a name, click the ‘aanmaken’ button.

The database has been created! You can now close this browser window. After that, to test and develop this project locally, we need to clone the base code from the main repository. To get started open a powershell or cmd console and peform the following commands below:
(cmd) $ cd {path/to/xamp/htdocs}
(cmd) $ git clone https://github.com/RedFirebreak/OpenICT-Checkin.git
Now, preferring on your installation choice, move the insides of the now downloaded folder to your preferred web-space. You do not have to keep the path specified in this tutorial, as long as you know where you store the pulled github files
In the project folder, copy the .env.example to a new file called .env and fill in the config file. By default, you can use root as the database password with an empty password.
Note
Make sure to prepare the required database in advance. If no database is present, the application will NOT load and you will see a 500: error message.
After cloning, go into path of the cloned folder and keep the terminal open
(cmd) $ cd {path/to/xamp/htdocs/project}
(project/) $
And switch to the dev branch for your developing
(project/) $ git checkout dev
With the still opened terminal, peform the following commands:
(project/) $ composer install
(project/) $ composer update

(project/) $ php artisan key:generate
This will install all the required filed, make sure they are updated and set them up for auto-loading. After this, you will generate your own security key for the application. After this, you can begin to prepare the database. In a development situation, you are required to set up your own database, including some dummy data to get started. If you have set up your database connection in the .env file, you can start the next commands:
(project/) $ php artisan migrate
(project/) $ php artisan db:seed
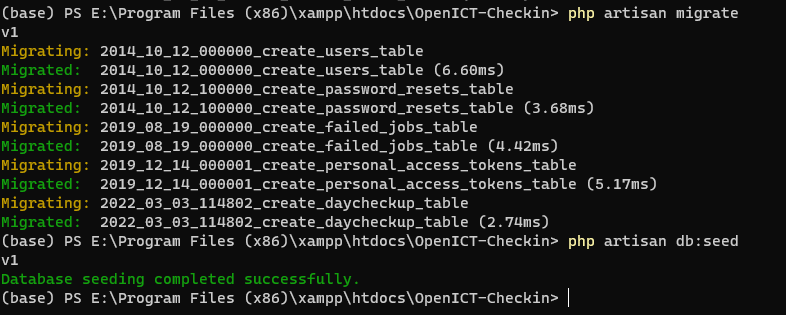
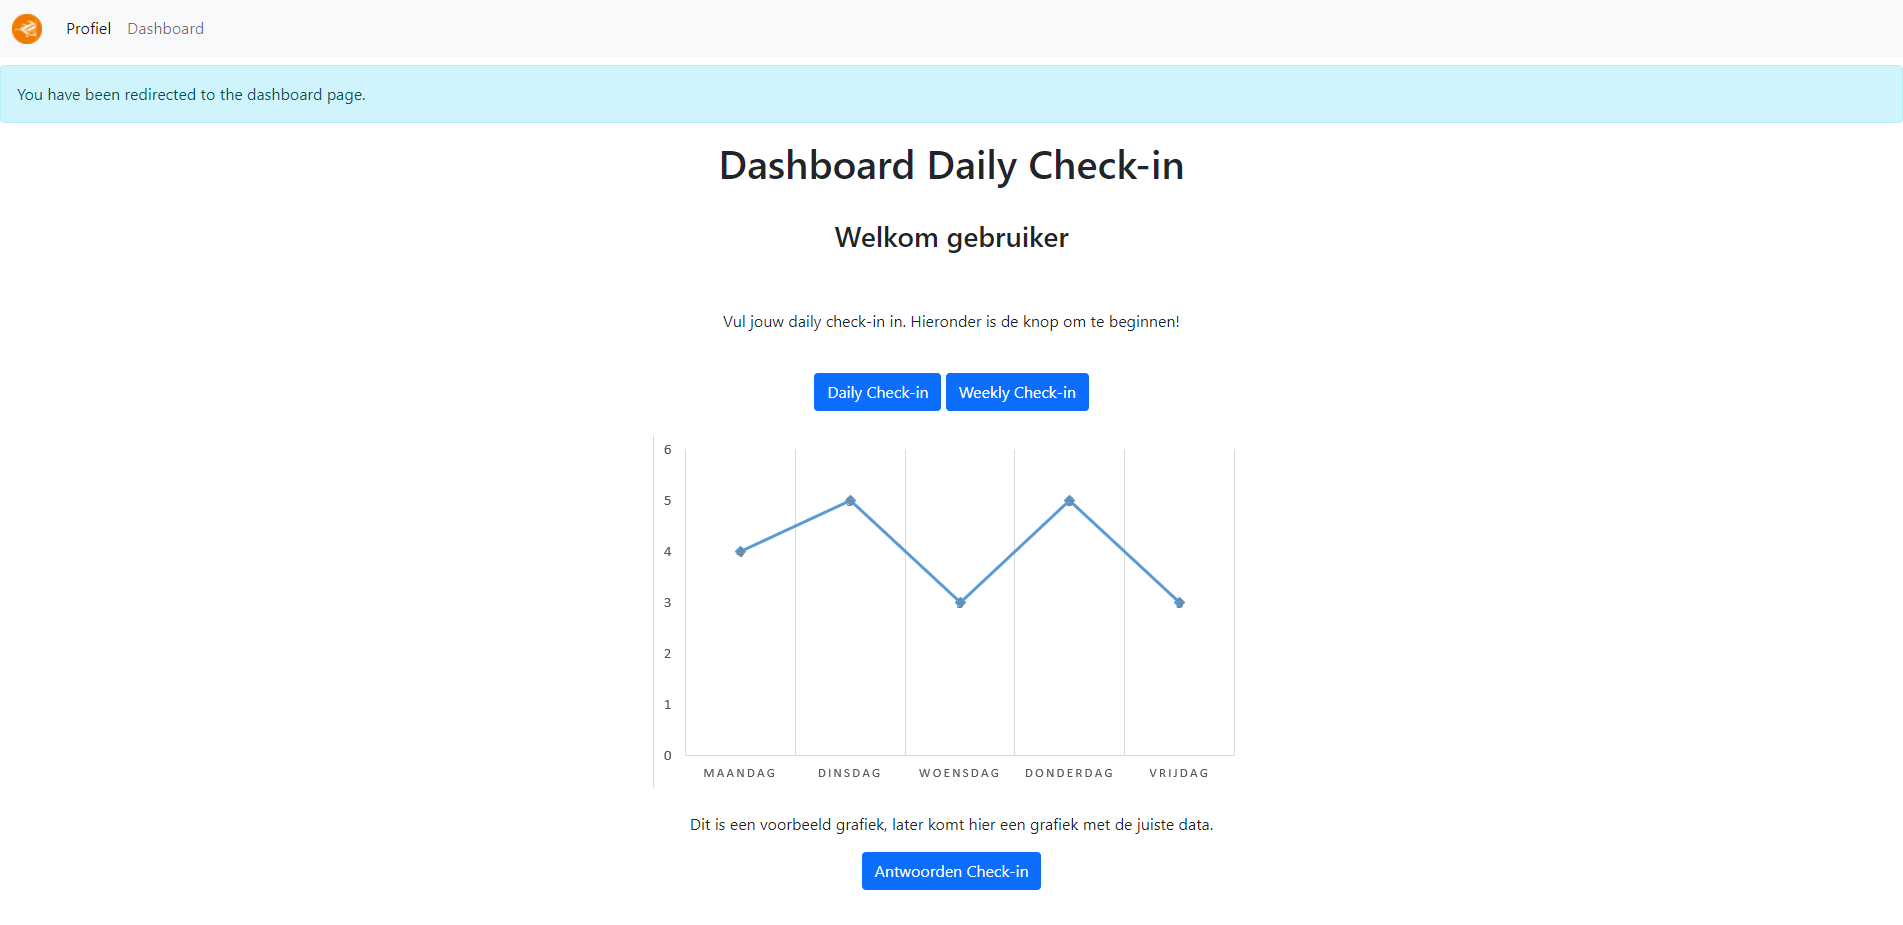
If all goes well, your databse should now be created and filled with some dummy data. Technically, you should now see the project as below! You can also click this link to go to the localhost page.
Note
Error 500 page instead of the project? Or a different error? Make sure to restart the apache server and run composer update again to make sure the application can gather all the packages. Otherwise, google the error given for a quick fix, or call for your team! :)
Updating
To update the application, move a cmd to the git cloned project directory and peform the following commands:
(cmd) $ cd {path/to/xamp/htdocs/project}
(project/) $
Then, with the same cmd screen open:
(project/) $ git pull
(project/) $ composer update
To deploy the latest database, use the following commands:
(project/) $ php artisan migrate
(project/) $ php artisan db:seed
The application is now up to date with the dev branch as you should see on the development website
Usage
INCOMPLETE